Showing posts with label cooking recipe. Show all posts

Thursday, May 30, 2013

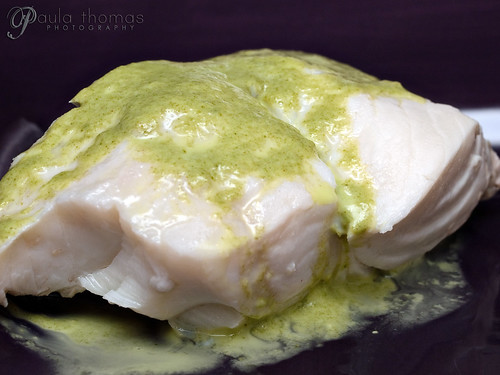
In this recipe, the halibut is cooked in the slow cooker or crock pot. It contains very little oil because it is a lean fish. It can dry out pretty fast when cooked improperly or too long. While it is cooking, the white wine sauce is added to the dry halibut steaks. It also provides moisture and flavor, allowing the meat to absorb the flavors well. There is no need to marinade the halibut like many recipes require. In the process of slow cooking, the flavors the fish will penetrate deep into the flesh and make a really tasty dish. Also enhancing the moisture and flavor of the fish is the lemon added at the end.


One of the most delectable and versatile fish to cook is halibut because of its firm, mild and white flesh. To make a simple yet delightful gourmet meal, halibut is cooked in the crock pot with a luscious and creamy white wine sauce in this recipe. Halibut is a large flat fish. Its range in sizes depends on its age and kind. The California halibut is relatively smaller. While the Pacific halibut is gigantic in size and can grow up to more than 500 pounds. Most of the time, halibut is sold as steaks in markets and groceries.

Halibut is very healthy. It can be included in the weekly diet because it is sustainable, especially the Pacific halibut. Most of the halibuts sold in the market are Pacific, specifically Alaskan fishery. California halibut is available in California and usually caught between 4 and 12 pounds. But these kinds of halibut are sold as fillet since they are relatively small in size. Both kinds of halibuts are similar in taste and texture. Halibut can be sold fresh or frozen. This kind of fish stores very well as long as it is vacuum-sealed. It can retain its quality for a year. Lots of online video recipes are available for viewing just click the link.


Ingredients

250gms packages halibut - steaks, thawed
2 tablespoons flour, all-purpose
1 tablespoon white sugar
Salt to taste
100gms butter
1/3 cup white wine - dry
2/3 cup milk - or half and half
1 lemon cut into 4

1. Dry the halibut steaks. Then put them in Crock-Pot.

2. Mix the flour, sugar and salt in a separate bowl. Set aside.

3. Melt butter in a pan and add the above flour mixture. Keep stirring. When it combines well, add wine and milk. Cook over medium heat until thick consistency is reached while stirring constantly.

4. Let it boil for a couple of minutes. Pour this sauce on the dry halibut steaks. Cover. Cook on High flame for about 20 minutes.

5. Once cooked transfer halibut to serving plate. Garnish with chopped lemons.

Healthy Spicy Beef


Peppers hot or not may do more than round out your omelet, spice up your salsa, and make for a colorful stir-fry. They help you get some of your daily vitamins and contain compounds that may be linked to weight loss, pain reduction, and other benefits. Peppers, by the way, are fruits, not vegetables. They have been popular in all sorts of recipes for a long time, including with the ancient Aztecs. And now they’re getting new attention from researchers eager to unlock their potential health benefits.

Whether spicy or sweet, peppers contain many phytochemicals, which are naturally occurring compounds found in plants. Many of peppers' phytochemicals have antioxidant abilities. This means they can help neutralize free radicals in the body, which damage cells. So they may help prevent or reduce symptoms of certain diseases. Similar to hormones, some phytochemicals also act as messengers in the body. Peppers come in a rainbow of colors, including green, red, yellow, orange, and even purple, brown, and black. Lots and benefits are stored in these peppers so better look into these video recipes online now.

Ingredients

1 1/2 lbs. round steak cut into strips
1/4 cup olive oil
1/4 tsp. coarse ground black pepper
1/3 cup onion, chopped
1 garlic clove, minced
3 green bell peppers, cut into slices
3 red bell peppers, cut into slices
1 1/2 cup celery, diced
1 cup beef bouillon
1 tbsp. soy sauce


1. Cut round steak into 1” long strips, about 1/8” thick.

2. In a large skillet, over medium-high heat, heat oil and black pepper. Add steak and stir-fry until meat is brown, about 5 minutes.

3. Stir in onion and garlic. Then add peppers and celery. Pour in bouillon and soy sauce.

4. Cover pan, reduce heat to medium, and cook until meat and vegetables are tender, about 10 minutes.

Tuesday, May 28, 2013

A Recipe for Choco Lovers

Chocolate in many incarnations is always a lovable dish, like this Mousseline de Genepi with Chocolate Fondue recipe by Chef Marc Veyrat. This recipe is composed of two parts. The first part is the sabayon itself (referred to as mousseline). The sabayon is simply egg yolks mixed with a “30° syrup” – a syrup made from boiling equal amount of water and sugar or with 50:50 ratio for 30 seconds. To enhance the flavor and aroma add whipped cream and Génépi liqueur. Thus, the recipe is called “Mousseline de Génépi” or “Génépi liqueur sabayon.” The second part is the chocolate sauce. It’s made fully packed with chocolate flavor by using bitter chocolate and cocoa powder at the same time then sweetened with sugar.

Mousseline, Muslin in French, is a sauce or food like a mousse. It is prepared with whipped cream in it. Another way of preparing it is by puréeing or molding beaten egg whites instead, together with meat or seafood. It’s usually made with whipped cream and the ingredients used in a hollandaise sauce (mayonnaise). Mousseline is also used to describe pastries and cakes containing delicate mixtures with cream or butter. Many more online video recipes are available here.

Zabaione, an Italian term, also spelled as zabajone, or zabaglione, is called as sabayon in French. It is popular in different terms in other places. It is an Italian dessert made using egg yolks, sugar, and sweet wine (originally Moscato d'Asti in its old recipe). Presently Marsala wine is more widely used. Sometimes, whole eggs are also used for this. It actually is a custard, very light one because it is whipped to incorporate a large amount of air. Since the 1960’s, zabaglione is traditionally served with fresh figs. It is commonly served with fresh strawberries in a glass.

Ingredients

For the chocolate sauce:

2 cups water
0.33 lbs Caribbean chocolate
3.5 oz. cocoa powder
For the Mousseline de Genepi:
7 egg yolks
½ cup water
½ cup sugar
12.32 oz. (about 1 ½ cups) whipped cream
5 ½ tablespoons powdered sugar
6.4 oz. Genepi liqueur

1. Prepare the sabayon. Boil the water and sugar together for 30 seconds to make syrup. Heat up the egg yolks with this. Leave it to cool.

2. Melt some chocolate in a bain marie. Cut some plastic sheet or cooking film into rectangular strips twice the height of a circular mold and long enough to cover it. Shine it up with some cotton balls. Spread the chocolate sauce thinly on the plastic sheets. Roll one up and insert it till the bottom of a circular mold. Refrigerate.

3. Prepare the chocolate sauce. Heat up together chocolate with water and cocoa powder. Add sugar then mix together constantly stirring. Remove it from heat.

4. Take the sabayon then mix it. While mixing it, add the cream, Génépi, and sugar. Take the chocolate molds and fill each quickly with sabayon. Put them in the freezer.

5. Set the serving plates to a lukewarm temperature. While doing this, boil the chocolate sauce. When done, spread some chocolate sauce on the center of the plates.


6. Remove the sabayon filled chocolates from the freezer. Then remove the molds and the plastics. Set them on the plate then drizzle with some chocolate sauce on top. Serve immediately.

Apple Pineapple Muffins

In this simple but special recipe applesauce and crushed pineapple combine to make sweet and tangy muffins. You need pasty flour, granulated sugar, salt, baking powder, ground cinnamon, egg whites, crushed pineapple, unsweetened applesauce, pure vanilla extract, tart apple, and milk to make a light textured yet moist and scrumptious apple pineapple muffins. All the ingredients should be at room temperature before you begin making the recipe.

You can’t just whip everything together and place it in the tin when it comes to making heavenly muffins and hope it bakes perfectly in both texture and taste. The order of combining the ingredients is crucial. They dry ingredients and the wet ingredients should be blended separately. Then fold them in together gradually. Do not over mix the batter as this will produce tough and dry muffins. The egg whites need to be beaten separately alone until it is frothy and soft peaks form. This is crucial for creating a light texture when the muffins bake in the oven. The egg whites should be folded in the rest of the moist ingredients, not mixed. Fold in the egg whites gently with the use of a spatula. More online cooking videos, baking including is available at the link.

Before you make the batter the unsweetened applesauce must be ready. Ready-made applesauce is often available in the grocery but it is also quite easy to do at home. To make a simple unsweetened applesauce all you need are apples and lemon juice. Peel, core and slice the apples into chunks and place them in a Dutch oven or slow cooker. Add half as much water in proportion to the apples. Cover the pot with a lid and bring to a boil over medium high heat. Once the apples boil reduce the heat to a simmer and cook until tender for about 10 to 15 minutes. Then remove the pot from the heat and strain. Puree the apples in a food processor or blender and add lemon juice. Then place the mixture in the pot and bring to a boil. Before using to make muffins allow the applesauce to come to room temperature or place in the jar for future use.

Ingredients

3 cups pastry flour
1 cup granulated sugar
1 teaspoon salt
1 tablespoon baking powder1 teaspoon ground cinnamon
5 egg whites (room temperature)1 cup crushed pineapple
1 cup unsweetened applesauce
1 tablespoon pure vanilla extract
1 tart apple (cored, peeled, and diced)
½ cup milk

1. Preheat the oven to 350 degrees F. With nonstick spray coat a muffin tin or line the cups with paper.

2. Stir together the flour, sugar, salt, baking powder, and cinnamon in a bowl. In an electric mixer bowl, whip the egg whites on medium speed, until frothy. Whip on high until soft peaks form.

3. Stir together the pineapple, applesauce, vanilla, apple, and milk in another large bowl. Fold in the egg whites. To the pineapple mixture add about a third of the flour mixture, then fold the ingredients together. Keep adding the flour mixture a third at a time, folding it in gently, until all the ingredients are just combined.

4. Pour the batter into the muffin tin, filling each cup about 2/3 full. On a baking sheet place the muffin tin and bake for 20 to 25 minutes, or until a toothpick inserted into the center of a muffin comes out clean. Remove from the oven and for 5 minutes cool in the muffin tin. Then turn out the muffins onto a wire rack and cool completely.


Monday, May 27, 2013

Game Over for Rabbits


The mild and mostly white meat of rabbit is simply seasoned with salt and pepper and browned in butter in this gourmet recipe. The sautéed rabbits are covered in sumptuous gravy make with vegetables, rabbit meat, tomato concentrate, white wine, herbs, thick cream, and butter giving flavor to the dish and creating an extraordinarily unforgettable meal. The rabbit in a gravy sauce is served on a bed of lentils for a complete and satisfying dinner or lunch. Pair this with a good bottle of red wine such as Merlot, Pinot Noir or Shiraz. Bordeaux and Burgundy wines also go perfectly well with rabbit dishes.

Rabbit has very little fat and can quickly dry out and become tough. To avoid this, the rabbit meat should be cooked quickly on high heat sealing its juices and keeping it moist and tender. The creamy gravy used in this recipe also helps flavor the meat and give it additional moisture. For safety, cook the rabbit meat until it reaches an internal temperature of 160 degrees F. Do not poke or pierce the rabbit meat unnecessarily, however, since the little juices that it has will leak out and you end up with tough and dry meat. For more chef recipes you can go inside the link.
How to Fillet a Rabbit

When choosing rabbit for sautéing, choose a young rabbit, also known as a fryer, as opposed to a mature rabbit or a roaster. Young rabbit is more tender and moist than the older varieties, which are more appropriate for stewing or braising. Fryers have a fine grain and a bright pink flavor and can be cooked similarly to chicken. They are usually between 1 and 3 pounds in weight and are less than 12 weeks old. Roasters are generally over 8 months old and a little darker in color.

Don’t forget to soak the lentils overnight before cooking. The lentils will absorb the flavors from the gravy, vegetables and spices and make a perfect contrast and complement to the sautéed rabbit.

Ingredients

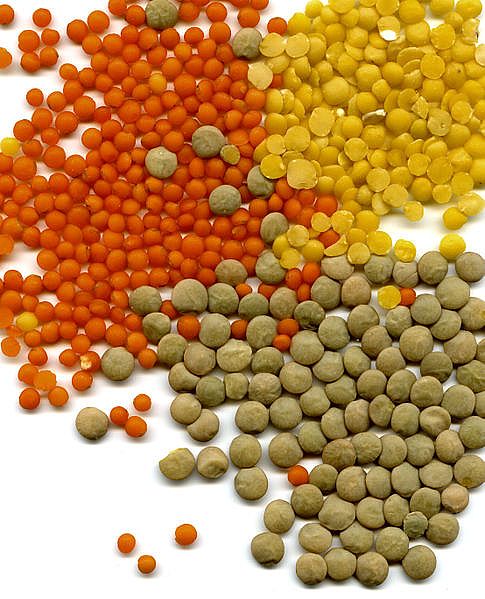
2/3 lb. green lentils
mixed greens (thyme, parsley, laurel)
3 rabbit fillets (about 2 2/3 lbs.)
5 large carrots
1 leek
1 tip of baking soda
2 shallots, butter
2 tablespoons cream
½ cup rabbit gravy
For the Rabbit gravy:
oil
1 lb. rabbit carcass - rabbit pieces (front, head) cut into small pieces
1 diced onion
sliced carrot
1 crushed garlic clove
1 tablespoon tomato concentrate
1 1/4 cups white wine
1 1/4 cups water
salt, pepper


1. Start preparing the rabbit gravy by heating oil in a large Dutch oven or similar an. Brown the rabbit pieces. Add the vegetables, allowing them to brown, stirring constantly. Add water, tomato concentrate, and white wine. Simer for 30 minutes. Allow to cool. Strain in a fine sieve. You should obtain about 1 1/4 cups gravy, which you can refrigerate for about 1 week or place in the freezer.

2. The night before preparing the meal, soak the lentils in lukewarm water. Cook the lentils in salted water with the mixed greens for about 30 minutes. Drain and set aside.

3. Prepare the rabbit fillets and cut each into 5 or 6 large cubes. Wrap in foil and refrigerate. Peel the carrots and dice one of them. Cut the other carrots into small balls, using a special knife. Cook in boiling, salted water. Keep only the white part from the leek. Cut it a la julienne (into long, thin strips) and cook in boiling, salted water with a pinch of baking soda. Refresh in ice cold water and drain. Mince the shallots and place them in an airtight container in the refrigerator.

4. Heat a small amount of butter and the minced shallots in a saucepan. Allow shallots sweat for a moment. Add the diced carrot, lentils, 2 spoons cream, 2 spoons rabbit gravy, and 1 oz. butter. Allow to gently simmer until the whole is smoothly bound. Season.

5. Season the rabbit pieces with salt and pepper. Place them in a pan with 1 ½ tablespoons butter. Sautee on low heat for 6 to 8 minutes (without browning), stirring regularly. Simultaneously, sauté the carrot balls in butter. Season. Sauté the leek a la julienne in some butter. Season. Boil the rabbit gravy for 1 minute. Bind on high heat by incorporating 3 tablespoons butter. Season.

6. Place the lentils in the middle of preheated serving dishes. Lay the rabbit pieces on top of them and sprinkle with the leek and carrot balls. Pour a spoon of gravy over each side.

Unlikely Tage Team in Soup


Don't be surprised that banana can accompany onions. Make something quite unexpected and try this banana and onion soup recipe. The tangy taste and pungent sensation of onions contrast wonderfully well with the sweet and mellow flavor of the bananas. Creamy, soothing, and surprising this unique dish will make an adventurous appetizer. It will turn your next dinner party into a revelation. All you need are bananas, onions, milk, hot water, butter, and salt and pepper to taste to make this simple recipe. The milk gives the soup a creamy mouth-feel while the butter gives it a rich and luxurious taste.

A new way to enjoy one of the world’s favorite fruit is this banana and onion soup. Bananas are usually eaten during breakfast on its own or with milk and honey or peeled and sliced and added to cereals. This creative recipe turns bananas into a savory dish. It can be enjoyed with some crackers or crusty bread. There are many kinds of bananas and each has its own distinct flavor. Cavendish bananas are the most common type of bananas available in groceries. Also known as Chiquita bananas, Cavendish has a solid yellow color when they are at their ripe stage, sometimes with a few brown spots. Green bananas can be ripened at home by leaving them at room temperature. Or they can be placed inside a paper bag for a faster ripening process. Cavendish bananas is easy to mash and make mushy type soup. Searching for other recipes? well just go here and you find tons of online video recipes so enjoy.

Ingredients

4 bananas, peeled, sliced
4 onions, chopped
5/6 cup milk, scalded
1 1/4 cups hot water
¼ cup melted butter
Seasonings to taste


1. Mix all the ingredients together in a saucepan.
2. Bring to a boil on low heat. This should take about 20-25 minutes. Cool and strain.
3. Boil again the strained liquid for about a minute. Serve hot in soup bowls.

Tender Beef at the Table

Ask any fine diner what the most succulent and delectable cut of steak is, and they will unanimously respond, "filet mignon." While filet mignon is the most expensive cut of beef there is, the price is well worth it. Aside from tingling your tastebuds, filet mignon also has many health benefits.
How to Make Filet Mignon with Rich Balsamic Glaze

The term "filet mignon" is French for "dainty filet." The term itself was first used in the book "The Four Million," written in 1906 by O. Henry. He used the steak multiple times throughout his book to create moments of romance and as a symbol of scrumptious treat. Today, this cut of beef still represents romance, as it is frequently served by restaurants as the main course on Valentine's Day.

Filet mignon is taken from the tenderloin of a cow or steer. The tenderloin is found on both sides of the spine, and because this particular muscle group is the least used, the tenderloin is the most tender and widely used in recipes. The portions of tenderloin that are cut from the smallest end of the tenderloin is filet mignon. It is most frequently served by restaurants in 4-, 6- or 8-oz. portions, and the price for a filet mignon dinner usually begins at $25. Filet mignon is generally cooked one of three ways: pan seared, grilled or cooked with bacon wrapped around it. Since the filet has very little fat, the bacon will add flavor and prevent the steak from becoming dry during preparation.

Ingredients


4 (4 oz.) beef tenderloin steaks
1/4 teaspoon salt
1/4 teaspoon freshly ground pepper
2 teaspoons minced garlic
1/8 teaspoon crushed red pepper
3 tablespoons dry sherry
2 tablespoons soy sauce
1 tablespoon balsamic vinegar
2 teaspoons pure honey
Olive oil spray

1. Season steaks with salt and pepper.

2. Spray a large skillet with olive oil and place over medium high heat. Once the skillet it warm, add the steaks, cooking in batches, if necessary to avoid over crowding. Cook for 3 minutes on each side, or until desired doneness is achieved. Remove steaks from the skillet with tongs and tent with foil to keep warm.

3. Add the garlic and red pepper to the skillet and sauté for half a minute. Add the sherry and bring to a boil. Add the soy sauce, vinegar, and honey and return to a boil, stirring occasionally.

4. Reduce the heat and cook for about 1 minute. Serve sauce spooned over the steaks, or on the side.

Saturday, May 25, 2013

Mashed Potato Pancake?

This scrumptious recipe considered as the Spanish version of the world-known potato pancakes is accented with cheese and ham to make it a complete meal which can be served as is. It is best served with eggs for breakfast and as a dish on the side to veggies, fish or meats at lunchtime or dinnertime. This can also be served as a snack to satisfy your craving whenever you just want to nibble on something appetizing.

This recipe uses potatoes that are boiled with the use of salted water till a level of tenderness is reached then mashed and mixed with flour, ham, cheese and butter, and pepper and salt are used to season it to create a batter like dough or pancake. The batter then after being shaped into patties are fried using a skillet till they are golden brown.With the cheese and the ham in every potato pattie, a very flavorful dish is thus made.The grated cheddar cheese used in this dish gives it a sharp flavor for an irresistible taste. The cheese not only contributes to its flavor but also its texture helps keep all the ingredients intact and to prevent the shape of the patties from being ruined especially when they are being shaped and already fried in the skillet.

This recipe is derived from Sarah Ainley’s Around the World in 450 Recipes.Fantastic for breakfast and known as Spanish potato patties, this recipe makes for an appetizing lunch or an appealing dish on the side at dinnertime. You can always prepare it anytime you wish! Wanting free video recipes well better check these out.

Ingredients


1 ¼ lb. potatoes, peeled and cubed
2 tablespoons butter
¼ cup grated Cheddar cheese
4 slices ham, chopped
½ cup all purpose flour
Spray oil
Salt
Freshly ground pepper

1.Using a saucepan, boil the salted water.
2.The potatoes then are added and cooked for 10- 15 minutes until they are tender.
3.Afterwhich the potatoes are drained and then mashed and mixed with the cheese and butter till they are melted.
4.Add the flour and ham. Stir well.
5.It must then be seasoned with pepper and salt.
6.The “dough” must then be divided into 8 and shaped into about ½ in. thick discs.
7.Add oil to a skillet.
8.Afterwhich the potato pancakes must be cooked for 4-5 minutes on all sides till they are golden.
9.Use paper towels to drain them before serving.

Making Your Own Chicken Curry

The history of curry goes back a long way. In fact, there is evidence of it being used in 1700 BC Mesopotamia. While use of curry probably originated in India, it was used in England as early as the 1300’s and probably even earlier. Mention of its use can be found in the first book written on English cooking, written during the time of Richard II (late 1300s).

Curry is used in the cuisine of almost every country and can be incorporated into a dish or even a drink. The word comes from “Kari” which is from the Tamil language and was later anglicized into “curry”. Curry powder itself is not a single spice but a blend of different spices and can be mild or hot. This golden colored spice is one of the oldest spice mixes and is most often associated with Indian cuisine.

Interestingly enough, the word curry has a different meaning on the Western world then in India. In India, curry refers to a gravy or stew dish. Typically these dishes contain the Indian spice mix garam masala along with ginger, chili, cumin, coriander, turmeric, and sometimes onion and garlic, but it can be made up of many things. In India different curry ingredients are regional. In the West, when we think of curry, we think of curry powder or dishes seasoned with it.

Adapted from the Eating Well Cookbook. The yogurt and curry spices make a rich, creamy sauce for this flavorful dish. Using nonfat yogurt and skinless chicken make this dish healthy, as well. For one of the best cooking videos just feel free to go in the link.

Ingredients


1 tbsp. olive oil
2 medium cloves garlic, minced
1 large onion, minced
1/2 lb. boneless, skinless chicken breasts, cubed
1/4 cup water
4 tsp. curry powder
1/4 tsp. cayenne pepper
1/2 golden, seedless raisins
1/4 cup apricot preserves
2 tbsp. cornstarch
2 cups plain nonfat yogurt
1/2 tsp. coarse ground black pepper

1. Pour oil in large skillet. Sauté garlic and onions until both are golden.

2. Add chicken cubes and sauté until browned.

3. Add water, seasonings, raisins and preserves. Simmer, uncovered, 15-20, until chicken is cooked through, stirring occasionally. The liquid should be mostly absorbed.

4. Measure cornstarch into a small bowl. Add cornstarch, stirring until cornstarch dissolves.

5. Add mixture to skillet, stirring to combine. Simmer, stirring continually, until the sauce thickens, but do not boil.

6. Season with pepper and serve.

Loving that side dish

Because onions are small and their tissues leave little or no trace, there is no conclusive opinion about the exact location and time of their birth. Many archaeologists, botanists, and food historians believe onions originated in central Asia. Other research suggests onions were first grown in Iran and West Pakistan. It is presumed our predecessors discovered and started eating wild onions long before farming or even writing was invented. Very likely, this humble vegetable was a staple in the prehistoric diet.

Most researchers agree the onion has been cultivated for 5000 years or more. Since onions grew wild in various regions, they were probably consumed for thousands of years and domesticated simultaneously all over the world. Onions may be one of the earliest cultivated crops because they were less perishable than other foods of the time, were transportable, were easy to grow, and could be grown in a variety of soils and climates. In addition, the onion was useful for sustaining human life. Onions prevented thirst and could be dried and preserved for later consumption when food might be scarce. While the place and time of the onions origin is still a mystery, many documents from very early times describe its importance as a food and its use in art, medicine, and mummification.

The Caramelized fennel onions and garlic recipe is an exceptionally rich tasting and scrumptious dish that can be served at all times. Serving fennel, sautéed with onion rings and garlic cloves brings out a captivating range of delicious tastes and aromas that have made this dish into such an important treat in notable restaurants and eating places. However despite its seemingly complicated nature this dish is actually very easy to prepare and cook. Indeed while following this easy and simple recipe anyone can make a finger licking dish right in their kitchen regardless of their experience level or expertise in cooking. For more online video recipe just go in the link and be amazed.


Ingredients


3 fresh fennel heads sliced thinly and round separated
3 medium white or yellow onions sliced thinly and rounds separated
1 cup of whole fresh garlic cloves
3 tablespoons Olive oil
Lemon pepper (to taste)
Salt (to taste)

1) Assemble the fennel, onions and garlic on a working table. Wash them and then slice the fennel and onions into thin rings and set aside.

2) In a deep frying pan heat olive oil over medium heat.


3) Add the sliced onion and fennel rings and the whole cloves of garlic into the hot olive oil. Allow to cook while stirring regularly.

4) Sprinkle the mixture with lemon pepper and add salt to taste.

5) Turn the heat to low and stir the dish frequently to avoid any burning. Cook until the ingredients turn brown. Ensure that they are evenly and completely brown without burning at all. Cook for about 10-15 minutes to achieve this pleasant coloring.

6) Remove from heat when ready and serve with an appropriate entrée or any meat dish and vegetables.

Friday, May 24, 2013

Heavenly Taste of Fudge

Before 1886, the origin and history of fudge is unclear, but Fudge is thought to be an American invention. Most believe the first batch was a result of an accidental “fudged” batch of caramels, hence the name “fudge”.

In 1886, fudge was sold at a local Baltimore grocery store for 40 cents a pound. This is the first known sale of fudge. A letter, found in the archives of Vasser College, written by Emelyn Battersby Hartridge reveals that Emelyn wrote that her schoolmate's cousin made fudge in 1886 in Baltimore and sold it for 40 cents a pound. More chef recipes are available in just a push of a button.

In 1888, Miss Hartridge asked for the fudge recipe, and made 30 pounds of fudge for the Vassar Senior Auction. The recipe was very popular at the school from that point forward. Fudge became a new confection after word spread to other women's colleges of the tasty delight. Later, Smith and Wellesley schools each developed their own recipe for fudge.

Ingredients


1 (14-ounce) can sweetened condensed milk
1 tablespoon salted butter
1/2 teaspoon salt
18 ounces chocolate (buy the best chocolate you can find — this should be a pure chocolate see note below)
1 teaspoon pure vanilla

1. Line an 8-inch square pan with parchment or foil and set aside.

2. Heat sweetened condensed milk, butter and salt on medium low in a 2-quart sauce pan.

3. In a separate container, pre-melt the chocolate in the microwave until it is totally melted and stirred – no lumps. Be careful to not overheat the chocolate in the microwave -- use 30-second intervals and stir at every break. When the sweetened condensed milk is warm and has loosened up, pour all of the chocolate into the sauce pan with the milk. Stir with a wooden spoon. The mixture will be thick as the chocolate incorporates and then it will get glossy. When your mixture turns glossy, add vanilla and stir quickly. Remove from heat and pour IMMEDIATELY into the prepared pan. Cool for several hours in the refrigerator before cutting into small squares. Fudge is best kept in an airtight container and eaten within 4-5 days.

4. This recipe can be doubled and put in a 9- by 13-inch pan.

5. A note about chocolate: Buy a high-quality chocolate at a retailer like Whole Foods or Trader Joe’s. Chocolate chips or the chocolate sold for dipping fruit are not good choices as they have stabilizers in them which makes for a stiffer fudge.

Taming those Wings

A popular Super Bowl staple, the hot chicken wings are always partnered with a cold glass of beer, a proof that hot and cold can be a perfect match. Delicious hot chicken wings is universally enjoyed and easily appreciated by almost any nation, culture, gender, or age. Aside from the Super Bowl, hot wings are commonly seen in frat parties, backyard barbecues, bistros, bars, and sports night. You can throw a party in an instant without any fuss by simply cooking a large batch of this hot wings recipe. It’s a great recipe for all the seasons of the year. Served with ice cold beer or red wine, hot chicken wings dish is always a sure winner. It is also great to cook and take the unpretentious and delicious hot chicken wings in any potluck. You really can’t go wrong with this all-occasions dish.


To make your chicken wings exceptionally tasty, you have to fry the chicken in oil and butter until crispy and golden. The butter infuses the chicken with that irresistible flavor aside from the other layers of flavors stacked onto it. You need a deep-fryer, a deep skillet, or a Dutch oven to be able to do this. Coat the chicken wings with not too thickly flour and beaten eggs to make your chicken wings truly crispy. The batter will burn before the meat is cooked through if the coating is too thick. Do not overwhelm the juicy and crispy chicken skin, which is where most of the good greasy addictive flavor is concentrated, with thick coating of eggs and flour.

Dust the chicken with the all-purpose flour then lightly dip it in the eggs, beaten with a whisk, and then coat it with a little bit more of flour to get ample crunch and flavor. Fry the chicken at a high temperature of about 360 degrees F. Choose to cook it in an oil that has a high smoke point, or one that won’t break down at very high temperatures. Canola and sunflower oil are highly recommended. Peanut oil may also be a good option but it will slightly flavor the chicken with a hint of nuttiness. For online video recipes for super bowl, feel free to go to the link.

Ingredients


8-10 wings
1 cup butter (melted)
2 cups flour
2 eggs whipped
For the Sauce
1 tbsp garlic powder
1 tsp crushed red pepper
2 tbsp sirarcha sauce
1/8 cup tabasco (or other hot sauce)
1 tsp pepper
1 tsp cayenne
1 tbsp mustard
1 cup parmesan

1. Use chicken wings that are not frozen. Pat them dry with a cloth to absorb moisture.

2. In a shallow bowl, beat some eggs. Lay out flour on a sheet on a clean table.

3. Dust wings with flour, then coat with the beaten eggs. Before frying, coat thinly again with flour.

4. Fry in butter and oil at about 360 degrees F until golden brown and lay aside.

5. Combine the following: garlic powder, crushed red pepper, siracha, Tabasco, pepper, cayenne, mustard, and parmesan. Heat all together in oil to warm. Pour sauce over wings.

6. Fry for 5-10 minutes again until sauce is dark. Serve hot and enjoy!

A Tiramisu Special

Perhaps one of the most popular Italian desserts loved all around the world, Tiramisu is a coffee-flavored sponge cake with mascarpone cheese and ladyfingers. In this recipe by renowned chef Renato Piccolotto, tiramisu is prepared as a cupcake with a chocolate gondola served in a pool of custard cream and drizzled with chocolate sauce. This is the gourmet tiramisu served at the legendary Hotel Cipriani, known as Cipriani Tiramisu. You can make this at home and serve it to family and friends, paired with coffee, tea or cognac for a wonderful way to end the evening or a lunch meeting.

One of the special ingredients you need to make a rich and decadent tiramisu is the Italian cheese known as mascarpone. This is a type of cream cheese that is made of 60 to 75% milk fat. It is a very rich cheese, yet light and airy at the same time, typically sold in small containers in the chilled section of the grocery. Italian mascarpone produces an ethereal and luxurious tiramisu while the American version of cream cheese will produce a denser and heavier tiramisu.

If possible, use the Italian version of ladyfingers, known as Savoiardi. Ladyfingers are a type of sponge biscuits or sponge cookies that are sweet, light and oval in shape. They are also known as sponge fingers, Savoy biscuits, Naples biscuits, Boudoir biscuits, or biscuits à la cuillère. These crisp but spongy and delicate biscuits are soaked in the freshly brewed coffee, preferably espresso, and layered with the rest of the tiramisu. If you can get Italian coffee brands that are high quality and rich in flavor, the better. Some popular Italian brands include Cello, Kimbo, Mauro, and Lavazza. More video recipes like this are available in the link.

Use the freshest organic eggs that you can find since the eggs in this recipe will be prepared and served raw. You can also mix the eggs in a bain-marie or over a water bath or double-boiler to heat it a little without scrambling it.

Ingredients


8.8 oz. mascarpone (an Italian triple-cream cheese)
3 eggs (separated)
5 tablespoons sugar
1 ½ tablespoons Italian Marsala wine
12 long sugared cookies (lady fingers)
¾ cup strong coffee
1 ½ tablespoons cocoa powder
1 small cup molten chocolate for garnishing

1. Separate egg yolks from whites. Add sugar to the yolks. Beat the yolks and sugar with a hand mixer smooth and creamy. Add the mascarpone and stir gently. Flavor with Italian Marsala wine. Mix until you get a smooth cream with an even consistency.

2. Clean the whisk or hand mixer and beat the egg whites until it becomes a foamy mousse with nice stiff peaks, fold them in to the yolk mixture.

3. Dip the ladyfingers or Savoiardi biscuit in the coffee and place on the chocolate cup. Cover with the mascarpone mixture, sprinkle with powdered cocoa. Place chocolate gondola on top.

4. Spread Italian custard cream on a plate. Make decorative patterns with chocolate sauce on the custard. Place the tiramisu in the center and serve.

Barbecue Beef That's Off the Bone

In the southern states of the U.S., diners prefer the tender, juicy goodness of pulled pork and beef. Pulled beef barbecue is a versatile dish. It can be served with potatoes, rice, or pasta, or with a side dish of salad, beans, or sautéed vegetables. Popularly, it is served on sandwich buns or rolls to make a saucy and spicy sandwich. Or it can be wrapped in tortilla to make a hearty Mexican or southern U.S. style snack.

Making this delicious pulled barbecue recipe is more convenient with the use of a slow cooker of crock pot. Simply combine all the ingredients together in the pot then slow cook the beef for six to eight hours on low until it is tender and stringy, and can be easily pulled with a fork. You do not need to pay a lot of attention to the beef as it cooks in the slow cooker. You can leave it on its own for the most part of making this recipe. The result on the crock pot is a mouthwatering beef dish dripping with finger-licking good sauce.

Choose a nicely marbled center cut chuck roast for an exceptionally tender and scrumptious pulled beef barbecue. The use of homemade barbecue sauce is suggested but you may use your favorite bottled barbecue sauce available in groceries to make this recipe. If you are planning on many barbecued weekends, this dish can be frozen and stored for a long time. You can make hot beef sandwiches, quick quesadillas, beef taco, or shepherd’s pie. It is hard to get tired of this scrumptious dish as the snack possibilities are endless.

Simply spoon some hot pulled beef barbecue on buns to make yummy hot beef sandwiches and top with some fried onions or coleslaw and jalapeno peppers. Place pulled beef on flour tortilla for beef quesadillas and top with some shredded cheese and jalapeno peppers, fold tortilla over filling and bake in the oven or heat in a pan until golden. Spoon pulled beef barbecue in taco shells to make tacos, and top with chopped onions, tomatoes, lettuce, and shredded cheese.


Ingredients

1 beef chuck roast (approx. 3 lbs.)
1 can (14.5 oz.) diced tomatoes
1 can (14 oz.) chicken broth
2 tbsp. chili powder
2 tsp. ground cumin
1 tsp. ground oregano
3 large garlic cloves, minced
1 1/2 cups barbecue sauce

1. Place all ingredients in a slow cooker and cook on low heat for 6-8 hours, or until meat is tender enough to shred.

2. Remove meat from the cooker and let stand reserving the sauce. When it is cool enough to handle shred the meat. Set aside.

3. To a large saucepan transfer reserved sauce. On medium heat simmer until the sauce thickens. Add shredded meat and reheat. Serve on sandwich buns or wrapped up in tortillas.

Thursday, May 23, 2013

A Crab Cake Gourmet

Crab cakes have that crunch and golden brown color since they are made from breadcrumbs and egg then fried to a crisp. But Chef Luc Huysentruyt of the De Snippe restaurant in Knokke-Heist, Belgium, breaks the tradition by making the crab cakes out of a gelatin mold using beef jelly as the binder to the crab meat, pistachios, olives, carrots, and zucchini. Instead of a hot crab cake, you get a chilled wonder on a bed of string beans. A dollop of sour cream finishes the dish.

Select the best quality white crab meat you can find since its freshness will be more pronounced in this form compared to when fried. Everything tastes great fried so you will have to make a little effort in procuring the best ingredients for this reworked classic. For convenience, buy the pre-cooked and frozen crab meat at the grocery or supermarket. If you have an abundance of crabs at your disposal, you can also simply steam fresh live crab and pick the crab meat for use in this recipe.

The second important component of chef Huysentruyt’s recipe is the beef stock, which helps produce not only a fantastic flavor for the recipe but also helps in making the delicious and savory jelly. Its meat and bones have natural gelatin properties, producing a stock that will be easier to firm up later. Prepare a good and strong stock that has a clear color. Strain, degrease, reduce and clarify the stock so it’s as clear as daylight. There are lots of tips in this site like on how to pliage de napkin, just go in the site and enjoy.

The Verjus, a wine vinegar from green grapes, helps in flavoring and coagulating the beef jelly. The best ones are sourced from Perigord. To help mimic the textures in crab meat, crushed pistachios, leeks, carrots, celery and zucchini are added into the stock and suspended when the gelatin powder firms it up. Celebrate this quirky dish with a glass of Pouilly fuissé, a white wine from Burgundy.


Ingredients

crab meat
10 oz. of frost made with the clear beef soup
10 oz. Verjus (green grape fruit wine vinegar)
gelatin powder
pistachios
carrots, leek, celery, zucchini
tomatoes
string beans
olives
10 oz. sour cream liquid
dried vegetables

1. In a saucepan, combine the clear beef stock and the Verjus du Perigord. Simmer and season with salt and pepper to taste. Add in the chopped pistachios, leeks, carrots, celery, and zucchini. Stir. Set aside to cool then add gelatin powder.

2. In a clean container or mold, arrange the crabmeat at the bottom layer. Then pour the beef stock mixture on top of the crabmeat. Do not stir. Refrigerate.

3. In a serving plate, make a bed of tomatoes, olives, and string beans. Take out the crabmeat mixture from the refrigerator and arrange on top of the vegetables. Garnish with sour cream and dried vegetables.

Breakfast with Hot Cocoa

What's considered healthy is the actual cocoa bean, one of the world's longest-revered foods in many cultures such as the Aztecs. Cocoa has, in recent years, been shown to be a powerhouse of cognitive enhancement, antioxidants, flavonols, catechins and other brain & body-enhancing elements. A breakthrough study published by the American College of Cardiology found that daily cocoa flavanol consumption more than doubled the number of circulating angiogenic cells n the blood. These cells have vessel repair and maintenance functions, which contribute to healthy blood vessels, helping to prevent cardiovascular diseases.

Cocoa is also a good source of magnesium, believed to help relieve premenstrual and nervous tension. And most health professionals agree that it’s also a great source of antioxidants. A diet high in antioxidants kills those nasty free radicals that destroy healthy cells in the body, causing cancer, heart disease and premature ageing. Cocoa has nearly twice the antioxidants of red wine and up to three times those found in green tea.

Breakfast is the very important mean of the day and it has to be nutritious and full of carbs. This breakfast cocoa recipe here gives you the same energy through out the day that helps you go on and on. This recipe is good for a pair and for more gourmet recipes for two just go to the link.


Ingredients
1½ tablespoons prepared cocoa
2 cups boiling water
2 tablespoons sugar
Few grains salt


1. Preparation steps

2. In a pan boil milk.

3. Take a separate bowl and mix together cocoa, sugar, salt, dilute with one-half cup boiling water to make smooth paste, Mix well.

4. To this add remaining water, and boil for five minutes

5. Turn into boiled milk and beat for about two minutes, using hand blender till the desired froth is reached.

6. Pour it into your favorite dish and you are ready to have your cocoa drink.

Wednesday, May 22, 2013

Duck Fillets Cooked with Pear and Wine

Duck fillets are surely a delight to anyone who tastes it.
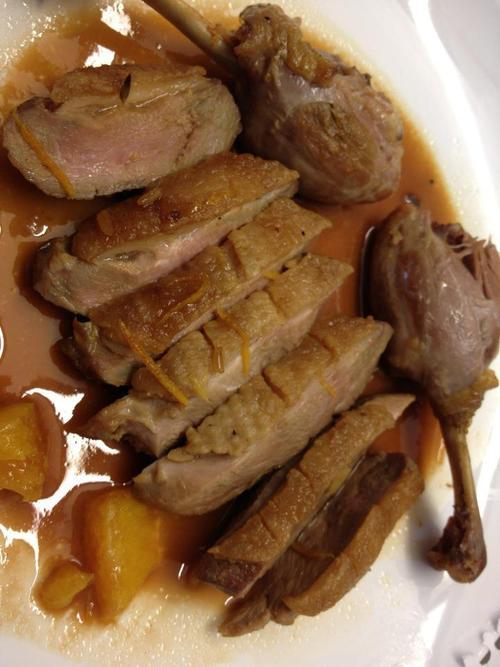
A French recipe term for thinly sliced duck fillets taken from the breast of the duck, aiguillettes, are very simple to cook. They have a comparably lighter color than other duck cuts and have a milder flavor. Duck aiguillettes are often fried quickly in hot melted butter, seasoned, and served as an appetizer. In this gourmet recipe, the duck aiguillettes are browned in butter quickly so that the inside remains pink and juicy. The sautéed duck strips are served with pears poached in red wine, seasoned with cloves, star anise, and juniper berries. The sweet and spicy pears make a wonderful contrast to the buttery and tasty duck.

Duck aiguillettes with pear in wine make a fine hors d’ oeuvres for fancy occasions. This dish can also be served with potatoes for a main fare. Fried or sautéed mushrooms go great with this recipe. You can also make this recipe using duck fillets or duck magrets, but this will take a bit longer to cook. Sear the duck on both sides and let the grease ooze out of the meat.

If you are using frozen duck meat, thaw it first in the refrigerator overnight or for a few hours. For best results, allow the meat to come to room temperature before cooking. Remove any excess fat to lessen the grease. Cut any tendons to prevent the meat from becoming smaller and tough when sautéing or frying. This recipe and many more cooking videos recipes here.

Use a nonstick frying pan for cooking the duck on medium high heat. The thick layer of fat under the skin of the duck will melt as the duck cooks so it is best to cook the duck with the skin side down first and then flip it to the other side when the fat melts and grease fills the pan. The duck is cooked when the juices run clear of blood.

Ingredients
2 pears (not too mature)
4 cups red wine (Bergerac)
3 cloves
6 juniper berries
1 star-shaped anise
butter
salt, pepper
16 duck aiguillettes or 2 duck magrets (fillets)


1. Peel the pears. In a saucepan, simmer the red wine, cloves, juniper berries, and star-anise. Poach the pears in the boiling red wine and drain it out of the liquid.

2. Reduce half of the wine.

3. Prepare the aiguillettes and fry them quickly in butter. Degrease.

4. Cook the pears in the duck cooking juice until the liquid is reduced almost entirely. Add the reduced wine and season. Add a large hazelnut-size scoop of butter to thicken the sauce.

5. Cut the pears in half and core. Place each half on a serving dish with the aiguillettes and cover with sauce.

Keeping It Healthy with Chicken and Brown Rice

  1. Chicken and brown rice, along with fresh herbs and spices, is a meal the whole family will enjoy. It can easily be served as lunch as well as dinner and is one of those dishes that seems to taste even better the next day after all the ingredients have settled into one another. It is both flavorful and healthy!

    This is such an easy meal to prepare and is so nutritious. You can really add whatever vegetables you like and any meat you prefer will work, too. I don’t use salt, but you can certainly spice it up with salt or any other spices you prefer. For more information on about other recipes and  free video recipes can be located with a press of a button.
     
    Ingredients 
    1 cup brown rice, uncooked
    3 cups raw or cooked chicken, cut into cubes
    3 tbsp Cinnamon, to taste
    Cayenne pepper, to taste
    8-10 broccoli crowns, cut into pieces
    1 cup finely grated (powdered) Parmesan cheese
    1 carrot, peeled and sliced
    2 tbsp. each fresh dill, tarragon, rosemary, sage, and mint, chopped
    1 cup Parmesan cheese, freshly grated
    Fresh salad greens
    1-2 avocados (cubed) (if you like avocados a lot use 2)

  2. 1. Cook the brown rice according to the package directions and set aside.

    2. Place chicken cubes in a medium-sized bowl. Add olive oil, cinnamon, cayenne pepper, and Parmesan cheese. Mix until chicken is well coated.

    3. In a large skillet over medium to high heat, cook the chicken cubes until the sides are crispy brown (If you’ve used raw chicken, then naturally, you’ll need to make sure the chicken is cooked through.) Stir as needed to make certain all sides are crispy brown.

    4. Add the rice to the chicken and vegetable mixture and let cook until the rice is getting crispy or done to your preference. You may want to add a little more olive oil at this point.

    5. Add the fresh herbs and fresh Parmesan cheese and mix well into the chicken/rice. Cover and cook a couple of minutes.

    6. Place the crisp greens on a plate. Spoon the chicken/rice/herb mixture over the top of the crisp greens and sprinkle with avocado cubes. Add an extra drizzle of olive oil, if desired.

Healthy Banana Breakfast

Banana is very much a staple fruit of India. One of the great things about bananas is that it is not only delicious but is also cheap and available throughout the year unlike the other fruits.


Banana is a fruit which is still very casually consumed for its taste, texture and a feeling of fullness unlike other fruits which are eaten due to their much known health benefits. The masses definitely prefer it due to its low cost. With whatever feeling it might be consumed, banana is nutritious and a wholesome fruit. This is a much lesser recognized fact. Except for its limitations for weight loss and diabetes, like other fruits this one too deserves high regards.
Looking for more ways to serve up bananas? well there are lots of easy cooking videos here.


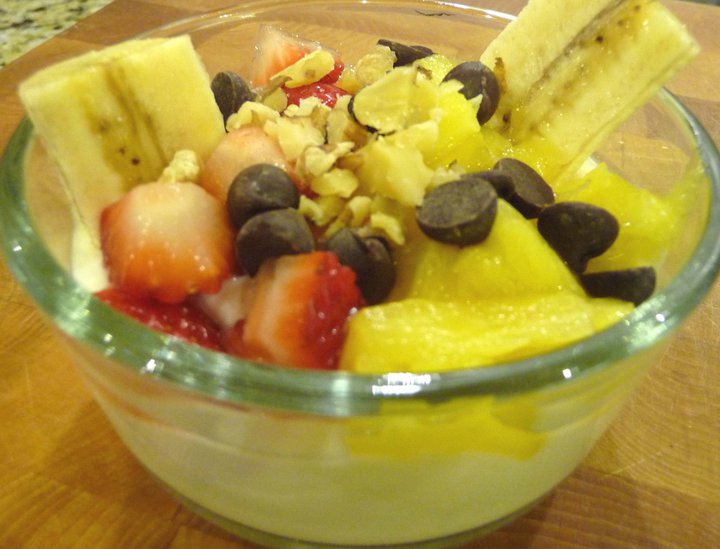
Here’s an easy breakfast combining fresh fruit, yogurt, and granola or cereal. Feel free to use whatever fresh fruits are available, depending upon the time of year.


Ingredients


1 honeydew or cantaloupe melon, halved and seeded
½ cup fresh pineapple or kiwi chunks
½ cup blueberries
¼ cup lemon yogurt
2 bananas
2 tablespoons honey (optional)
1 cup granola or other crispy cereal

1. With a lemon baller or ice cream scoop, make melon rounds. Set the balls on a baking sheet and place the sheet in the freezer.

2. In a small mixing bowl, toss the blueberries and pineapple. Fold in the yogurt.

3. Cut the bananas in half, crosswise. Cut each of these halves in half again, lengthwise. Place 2 banana slices in the bottom of a cereal bowl. Top the bananas with the melon balls.

4. Add the pineapple mixture to each bowl. If using honey, drizzle it over the whole. Sprinkle each bowl with cereal.

Monday, May 20, 2013

Ribs and Honey

You just woke up one morning and suddenly your craving to be in front of the grill and cook up some pork and you got those ribs on a stand by. Why not just marinate it then save it until dinner?
  1. This delicious dish is easy to prepare, but since you need to chill your ribs for 2 to 24 hours, the whole cooking time takes at least 2 hours. However, the wait and all is very worth it. After the wait come a very delicious, juicy and flavorful back rib dish that will surely make a big difference in your meal. Honey and onion rib is perfectly healthy, sweet, tender, juicy and awesomely mouth-watering. This is great especially if serve along with steamed or grilled vegetables you found in your pantry. I’m sure the next time you prepare this dish, time will no longer be an issue, right? On the other hand, please take note of important tips written along with this recipe because those are your secret for a delicious baby back rib recipe. For some of the the best food recipes in the world just click  the link


    Ingredients
    3 tbsp. dark brown sugar 
    2 tsp. ground cumin 
    2 tbsp. garlic powder 
    2 tbsp. coarse ground black pepper 
    2 tbsp. paprika 2 tsp. dry mustard 
    3 1/2 to 4 lb. pork loin baby back ribs 
    1 tbsp. olive oil 
    1/2 cup finely chopped white onion 
    1 can (8 oz) tomato sauce 
    1/3 cup beer 
    1/3 cup honey 2 tbsp. white vinegar 
    2 tbsp. Worcestershire sauce
    Dry ingredients are mix well in a bowl, with 3 tablespoon of the mixture reserved. Rest of dry ingredient mixture is then rubbed evenly over baby ribs. Rib is then place in a baking dish, cover and then chilled from 2 to 24 hours. When ready to grill, simply place ribs with its bone side down on a lightly greased grill. Cover and grill over medium flame for about 1 ½ to 2 hours or until ribs are tender and juicy. While grilling the ribs, heat oil in a saucepan and add onions and cook until tender. Then add the remaining ingredients and the reserved dry ingredient mixture and simmer until sauce thickens. When almost done cooking the ribs, brush ribs with the sauce. Remove ribs from grill, slice and serve with the remaining sauce. Smells good and taste so great, right?